Monday, January 27, 2025

Finishing a Kato office building

I know, long time no post.  I've been keeping busy with my American theme home layout but with another 5 day long exhibit of the AsiaNrail layout coming up at Hiller Aviation Museum in April I wanted to finish a few more things on the modules.

This Kato office building was one of the first Japanese buildings I bought back around 2009 but never finished.  A couple of years ago I did get around to painting it to get rid of the plastic look.  Now I want to get rid of the vacant look.

The Kato part number is 23-435 and they are still available.  These buildings are particularly well designed, have interior walls, and can be easily made taller or shorter 2 floors at a time.  I'm leaving this one at it's stock 6 floor height.


I decided that I wanted to light and detail the lowest 2 floors.  The ground floor was going to be a convenience store and the base already had detail for a restaurant so I cut that off with a hack saw. 


The base got a new floor and wall arrangement to resemble a small convenience store.  Shelves and counter were made from scraps of styrene and printouts of on line photos pasted to the shelves. 


The 2nd floor was going to be a pizza restaurant and the interior for that was built on the existing 2nd floor insert that is part of the kit.  Most of the fixtures were scratch built and the chairs came from a Pieser set. 


The upper floors windows got blinds printed out on paper, taped to the inside of the windows and set at various heights.  The upper floors businesses include a music school,  an optometrists,  a language school, and a dental clinic.  The signs were created using Google translate, then copying the Japanese text into Microsoft Visio where it can be edited for size and color.  Background color and any graphics are also added then printed out on plain paper.  Glossy package tape was used to give the signs some shine then they were pasted on styrene strip.


Here is a closeup of the floors with interior detail.  Two surface mount LEDs were used on each floor.  The restaurant has warm spectrum LEDs and the convenience store has white LEDs.


Here is the completed building back on the module.  I added that billboard sign on the side of the building from a image I found on the internet.  The type of glue featured in the ad is the same as what I used to paste some of the paper parts of this project.

The vertical signs on the front of the building were made the same way as the signs that are above each window then pasted to each side of a strip of styrene.


Wednesday, April 19, 2023

Report from the recent layout exhibit

We had our AsiaNrail layout setup from Wednesday, April 12th to Sunday, April 16th as part of the Trains and Planes exhibit at the Hiller Aviation Museum in San Carlos, CA.   With an overall size of 20ft x 10ft, this was one of the largest layouts we have done.  The layout consisted of an oval loop and a pair of long branch lines that connected to each other and to the loop through Paul's 4 way juncton module.  This was the first time I have had all my modules in the same layout at one time. 


I got to run my new Micro-Ace JR Kyushu 185 Yufu train that I had purchased last month while in Tokyo.  There are 4 cars to this set but we mostly ran it on the branches so we ran it in a 3 car formation.  It is shown here on Paul's Shifen Taiwan module set which was at the end of one of the branches. 


The opposite of end of the long double branch line was my Hot Springs module.  Shown here with my JR113 in Nagano colors and Hakone Tozan Railway trains sitting at the station.  I had built a new set of adjustable height legs for this module so it could be set up at the 51 inch AsiaNrail height.  The legs can also be set for Ntrak height for use in an Ntrak layout.  Another modification made to use it in this layout was to replace the sky board with a profile board so it could be viewed from both sides.


Several other modules made up this branch line and one of them was my 45 degree curved shoreline module, shown here as Paul's Hisatsu Orange Railway Type HSOR-100 passing through.


My 45 degree Highway Overpass module made it's second outing with this layout.  Shown here with Paul's Sanriku Railway Train crossing the bridge. 


It was great to have a layout at a show again after 3-1/2 years of not having any opportunities to do so.  This show also had a few other layouts in several scales.   This museum has this event during Easter week along with several other events so it was quite well attended.  It was just Paul and myself running the layout this time so we were on our feet most of the time.  I was mostly running the branch line which is why I have more photos of that part of the layout.

Tuesday, April 4, 2023

Shopping in Japan - Nakano Broadway

While in Tokyo in March I visited a shop recommended by one of my wife's cousins that I had not been to before.  As the title of this post suggest, it is in Nakano just a few blocks north of the station on the JR Chuo line.


The building is several floors of many shops featuring all kinds of things.  The floors are connected by escalators and I had the feeling that this building may have at one time been a large department store.  The shop I was interested in was identified by it's railway crossing colors on the front.

I had been looking for the Kato HB-E300 Buna set but it was out of stock here as it had been in all the other shops I checked on this trip.  But, I did find something that I had been looking for since my wife and I rode this train in 2017.  With the great exchange rate right now I am really happy with this purchase.  Lots of the items in this shop are resale but the operator of the shop was very good about letting me inspect the models carefully and test everything on the test track in the shop.  This will be running on the AsiaNrail layout setup next week.


Thursday, March 23, 2023

Getting ready for the next show

Back after a month in Japan and only 3 weeks before our next layout setup at the Hiller Aviation Museum as mentioned in the last post.  In this layout I will be displaying all of my Japanese modules.  The Hot Springs Junction and the pair of 45 degree modules were all checked out before we left for Japan and are ready to go.  Between now and the show I am checking out the Musashi-Koyama set of modules.  The modules came through the long period of storage just fine and only needed the track to be cleaned.

With each setup I try to have a little something more finished on the modules.  Over the next couple of weeks I plan to finish a Kato Diotown building that has been sitting on the module unfinished since it's beginning in 2011.

Here's the building in pieces as it sits on my work bench.   Right now going through all the stickers I have and figuring out what types of businesses will occupy it.


I also plan to work on some more street signage and add some more people that I purchased while in Japan.

Wednesday, February 8, 2023

A new beginning

The coronavirus pandemic has prevented train shows in my area over the past 3 years and the modules have been in storage all this time while I worked on my American prototype home layout.  But are slowly starting to open up again.   In most of the US shows and exhibits have already been opening up but California has been slower. 

We do now have a 5 day long exhibit scheduled in April at the Hiller Aviation Museum in San Carlos, California.  The dates for our part in the exhibit will be from Wednesday, April 12th to Sunday, April 16th.

This is a photo from our layout at Hiller several years ago.  This one will be similar but with a couple branch line added.


There will also be other layouts in the exhibit and of course the air museum itself is worth the visit.

The Hiller Aviation Museum is located at 601 Skyway Road in San Carlos, California.  This is the frontage road on the east side of US 101 just south of Holley Street.

LINK to their web site.

Thursday, January 26, 2023

An automated point to point system

It's been a long time since I've posted here and a long time since there has been a chance to set up and run the AsiaNrail layout.  The last setup we had was at the Narrow Gauge Convention in Sacramento back in the fall of 2019.  During all this time with the pandemic my energy has been directed toward my American Prototype home layout.  But AsiaNrail now does have an exhibit scheduled for April, more on that in a future post.

Having something on the schedule has motivated me to get the modules out and get them ready.  There is one project that I have been thinking about for a long time and thought now would be the time.

The AsiaNrail layout always has several stub end branch lines and often there are not enough operators to have them running along with a continuous running loop.  I thought it would be great to have something that could automatically do a point to point run on one or two of the branch lines.  My experience with the Azatrax IR train detection products on my home layout lead to to try out their point to point controller. 

First step after I got the controller was to try it out on a temporary Unitrack setup.  The control circuit itself is the green circuit board to the left of the track.  I made some temporary holders for the IR sensors from wood scraps.  I had this running two different trains that would alternately go out from one of two spurs, go to the end of the single line and stop for about 10 seconds before returning.  The controller took care of the turnout and also has an adjustable momentum feature built into it. 

Being satisfied with the results of the test setup, I went about making this into a setup that could work on a modular layout.  The Hot Springs Junction module would be the base and would have the IR sensors permanently installed under the tracks next to the station platforms.  In this mode the detection is caused when the IR signal is reflected off the bottom of a train.  The sensors would be behind the platforms at the station so would be almost totally hidden when viewed from the side.  The overhead view below shows these sensors pointed out in green.


The sensors at the remote end will need to be on whatever module is at the end of the run.  I made up a fixture from brass to hold the sensors at the end of a 25 foot long cable.  In this photo it is shown in it's storage box along with other layout electrical hardware.


The controller board was mounted in a plastic box with a clear lid so the indicator LED's could be seen.  This will hang on the leg cross brace under the module.  In this photo the lid has not been installed yet.  Connections to this control box are for power, the remote sensor and the main cable connection to the module.


This small test layout using the Hot Springs Junction module and the two small single track modules was used to further test and experiment with this control system.  Because the turnouts on the Hot Springs Junction module were not wired as power routing, I was not able to make make this setup work the same way as the Unitrack test setup.  In the interest of having something ready for this next show, for now this is going to run just the one train point to point.  Later, when I have more time I will redesign and wire things to use the full function of the controller. 


Tuesday, September 10, 2019

Report from the Narrow Gauge Convention

Last week was the 39th annual National Narrow Gauge Convention in Sacramento where we had our biggest yet AsiaNrail layout.  This was a great, well organized convention which included contest room, 2 vendor rooms, many clinics, and of course a large layout room.


In the layout room besides our AsiaNrail layout there were several other really great layouts in several scales, all narrow gauge.

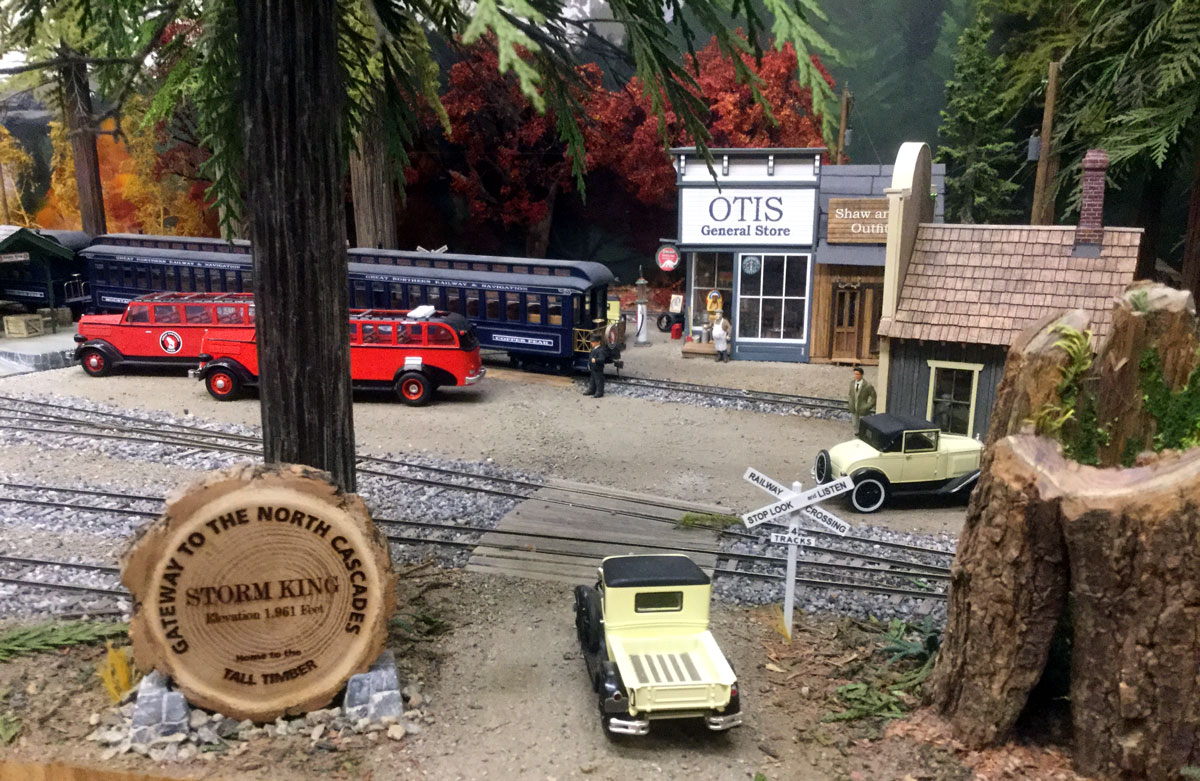
Just one example is this great scene is from an On30 layout called "Storm King".


One nice feature of this convention was that the layout and vendor rooms were opened from 8:00am to noon and from 6:00pm to 10:00pm.  So everyone got a chance to get out in the afternoons to the California State Railroad museum and to the many home and club layouts that were on a self guided tour.  Our crew visited 9 layouts including 2 garden railways.  While I have seen many G scale modular layouts at shows and a few at botanical gardens, this was the first time I had ever seen one in some ones yard and can see why it has become so popular.

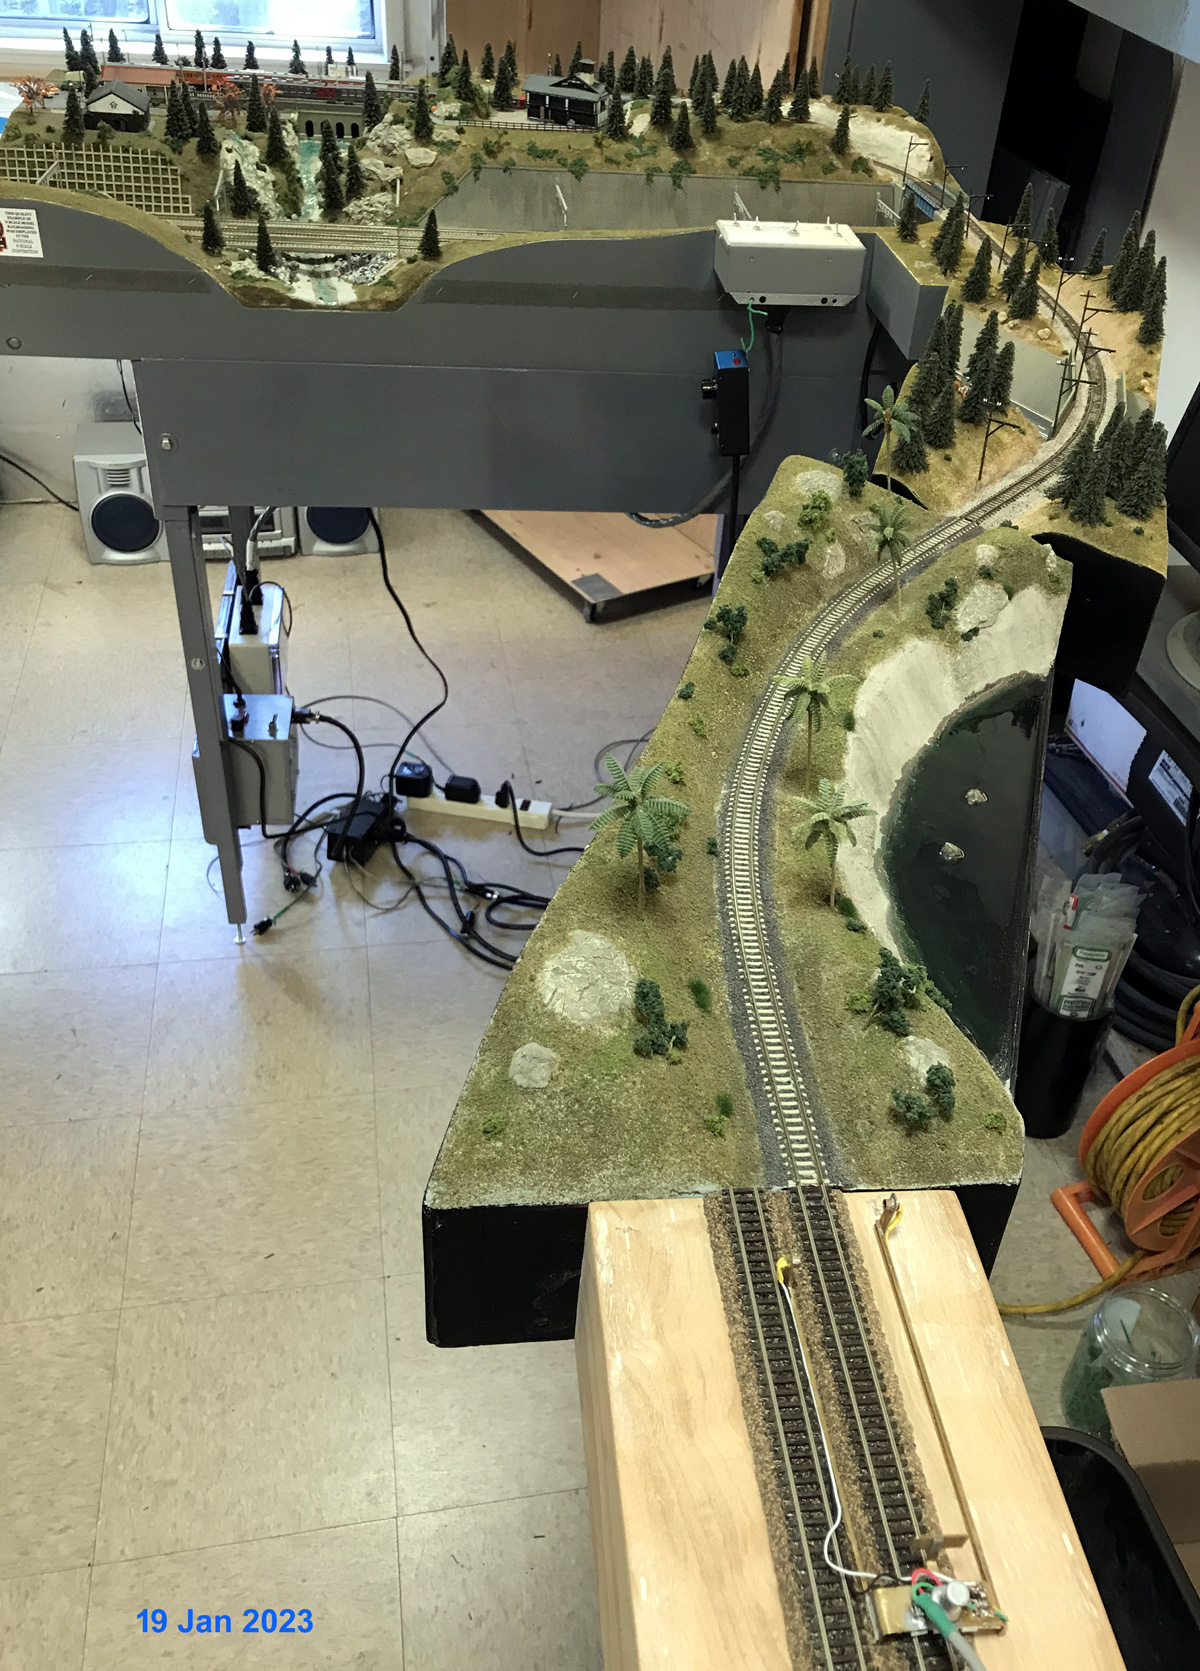
This is an overall view of our layout.  It was a triangle of 2+ meters on each side with Paul's wye module in the foreground feeding long branch and the 4 way junction feeding a pair of short branches.  We set the layout at the 51 inch height.

My new highway module was part of the long branch line.  With the magnets holding the vehicles on the highway I was able to put different vehicles on the highway every day.


Paul has also been working on some new modules.  With this new port module we now have inter-modal operations including a container crane and Kato container trailers.

For this new port module Paul came up with a way to make the water that I had never seen before.  He used obscured acrylic sheet bumpy side up with smooth color sheet on the bottom.


Paul has also been working on a car card traffic system for the layout and built some card boxes with a clever little table that folds out.  Here he is explaining to the crew how the system works.

Sam did not have his new module ready for this show but still made the trip up from the Los Angeles area and brought a nice table top display of items including an old steel herald from the front of a Japanese passenger train.


This was another successful outing for the modules.   I don't get to as many N scale conventions as I would like and after attending this narrow gauge convention I know I will attend others in the future.  It gives me more options to attend an event without too much traveling.  I may even be interested in attending a garden railway convention if it's close by.