It's time to ballast the track and while I have ballasted my share of N Scale track, this project presented some new elements.
- Using some pre-ballasted Kato Unitrack I wanted to match the color of that so I used Arizona Rock and Mineral Co. Gray blend limestone, part number 105-2. I like to use HO scale material for ballast because I will use N scale material for the smaller gravels like roads.
- First time using the Micro Engineering turnouts. I want to be real careful about getting any glue into these as I've already seen that they are more delicate than the Peco turnouts.
- Also the first time using any track with concrete ties, how will that look ballasted ?
So I started by removing the station platforms and placed blue painters tape over the area that the platforms go on.

Before applying any ballast I decided to paint the sides of the cork roadbed with some gray paint. This will help to hide any bare spots.
The cork roadbed could also be painted before laying the track so that the areas between the rails would also be covered but most of the bare spot problem occurs on the sides.

I apply the ballast first between the rails and then along the outsides of the rails. I like to use an old painting pad like the one shown in this photo to evenly spread the ballast.

A small dry paint brush is also used.
This is what it looks like with the dry ballast spread on a section of the track.

I used a "wet water" solution of 2 drops of liquid dish washing detergent to a 1 ounce bottle of water. I gently stir the solution and don't shake it so it won't get any bubbles. Then with a pipette I slowly release small amounts of this solution over the track and let it spread.

Then I used a 50 / 50 mixture of white glue and water mixed in an empty 1 ounce paint bottle again applying it with a pipette. I do between the rails first then along the outsides of the rails. I let this sit overnight to dry.

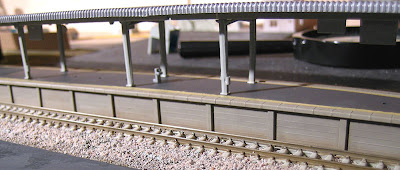
Here is a small example of the finished work. After the blue tape is removed, the platform has a clean area so it will sit flat and level.
While I am generally happy with the result I do think that the contrast in texture between the ties and the ballast cause the ties to look like the plastic that they are and if I were to do it over I would first air brush the ties with concrete colored paint. But you know everything we do in this hobby is a chance to learn something new.


