
I showed this reference photo in one of my first posts,
Streets and Buildings. This scene was just outside the station and is an important scene on the module that I wanted to re-create.
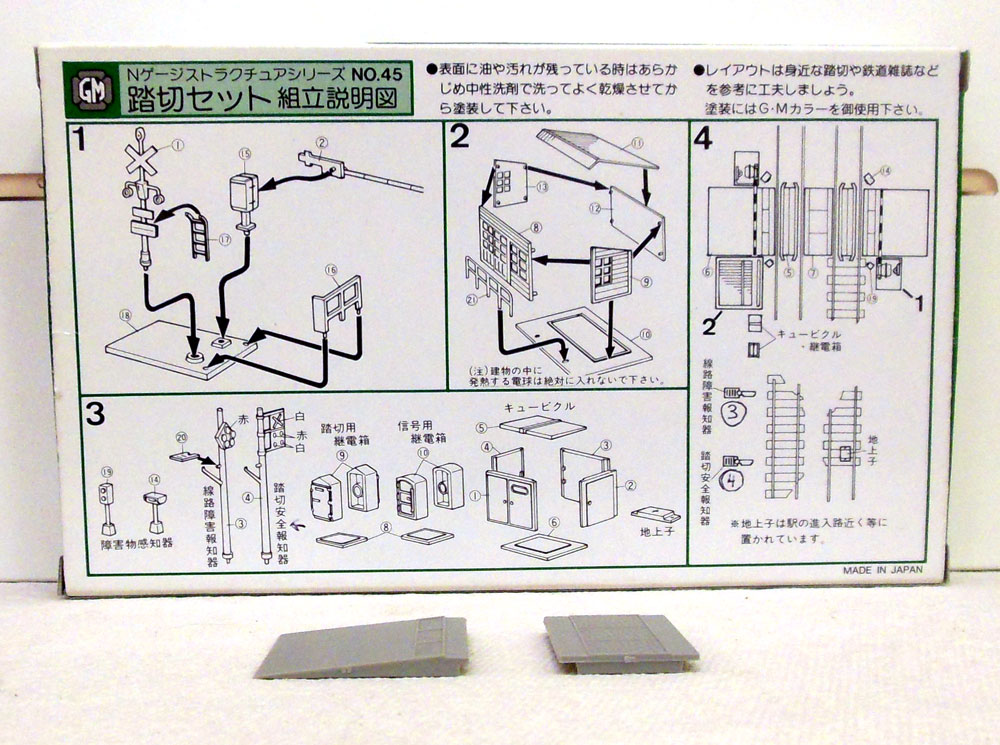
This is old Green Max kit number 45 and this is what I used to create the
grade crossing. I purchased a couple of these kits in Japan but they
are also available on ebay. The new number for this kit is 2153.
Besides the pair of crossing signals and gates this kit includes road sections, train signals, sensors, and other details. I did not use the road sections as I had already built up the roads.
The bases for the crossing gates were meant to sit at below track level and because I had already built up the roads and surrounding area the gates seemed abnormally high when compared to people. So I cut out sections in the cork as shown in this photo to lower the bases.
The edges of the now sunken bases were built up with .020 x .040 styrene strip. Then after gluing the base in place I patched up the road surface around it. Some of the road striping will also need to be redone.
I modified the gate arm assembly by drilling a hole in the
arm pivot point. Another hole was drilled through
the motor mount and tapped for a 00-90 screw to secure the arm to the mount. An extra Micro-Trains screw was used for this. Doing this allows
the arm to be moved between the lowered and raised positions.
The tiny ridges on the gate arms were handy as a guide for hand painting of the yellow stripes. The striping on the barrier is from a Kato sticker set.
Now this seems better.
So far just using the basic gates and signals from one kit at one crossing. There are also other signals that can be added and there is still the larger grade crossing on the 2M extension module to do.

 I showed this reference photo in one of my first posts, Streets and Buildings. This scene was just outside the station and is an important scene on the module that I wanted to re-create.


Welcome back Mr. Myers, It has been sometime since I have last visited this webpage. I really enjoy reading your content, you have published a lot of great information and photo documentation over the years. I am excited to hear more about your stories and experiences.
ReplyDeleteThank you Bryan, I am glad you are finding my posts enjoyable.
DeleteI really need to put more effort into my crossings. I finally got the proper double crossing gate setup (instead of having two that are backwards!) and I'm looking forward to setting them in properly on my layout.
ReplyDeleteThis is inspiring, as usual! :)
I procrastinated on these for a long time. Now that I have finally put them together I like them and want to do more. Because this kit has the gates and signals as separate pieces I think there is more flexibility in how they are placed.
DeleteI bought these gates but found that painting them (especially the yellow stripes) was too much work so I gave up. I will take a look at the TomyTec ones that you recently used.
ReplyDeleteThese sat in my stash for a few years before I got up the courage to build and paint them. Once I started, it went quite well and I was happy with the results.
Delete